OneSignal Push Notifications
You can push notifications to your clients using Firebase or OneSignal.
https://docs.shopbuilder.app/Features/firebase-push-notification/
https://docs.shopbuilder.app/Features/onesignal/
This guide explains the way to push notifications, configure/disable In-App messages to your users via OneSignal.
Remember to disable OneSignal if you push notifications using Firebase.
1. Push Notification
Push Notifications is a useful Flutter plugin. With this plugin, your Flutter app can receive and process push notifications on Android and iOS.
Requirements
- An OneSignal account if you haven't had one.
- An OneSignal App ID
Credentials Setup
Before setting up OneSignal, you must generate the appropriate credentials for the platform(s) you are releasing on:
iOS Setup
Step 1:
iOS Push Notification Certificate.
- Once again, in order to set up and enable the push notification feature in iOS devices, you must generate an iOS Push Notification Certificate and upload it to OneSignal
Step 2:
Run your app and push notifications.
- Note that the iOS Simulator does not support receiving remote push notifications. Therefore, you must run your app on a physical iOS device in order to test this feature.
- Test your app on a physical iOS device to make sure it builds correctly. You should be prompted to subscribe to notifications and you should be able to send yourself a notification from the OneSignal dashboard.
- To send a push on an iOS device, please refer OneSignal official documents
Android Setup
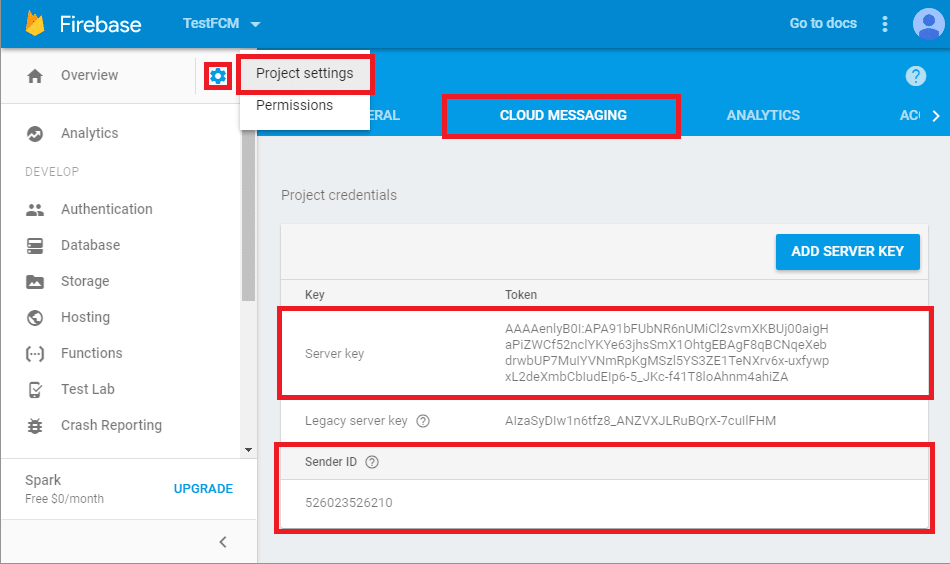
Step 1: Getting your Firebase Cloud Messaging Token and Sender ID
Click the gear icon in the top left and select Project settings. (Or create a new Firebase project if you haven't had one)
Select the CLOUD MESSAGING tab.
Save the two values listed under Server key and Sender ID.
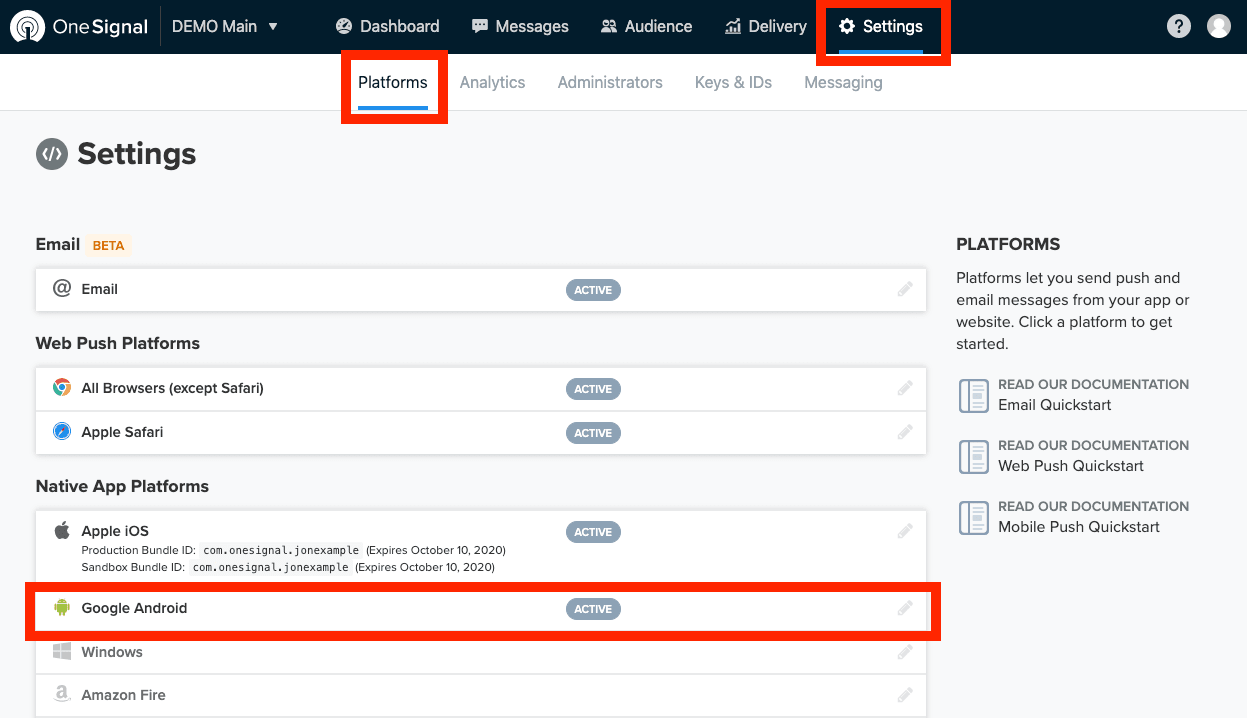
Step 2: Configure your OneSignal app's Android Platform Settings
In the OneSignal dashboard, select your app from the All Apps page, then go to Settings. Under Native App Platforms, click Google Android.
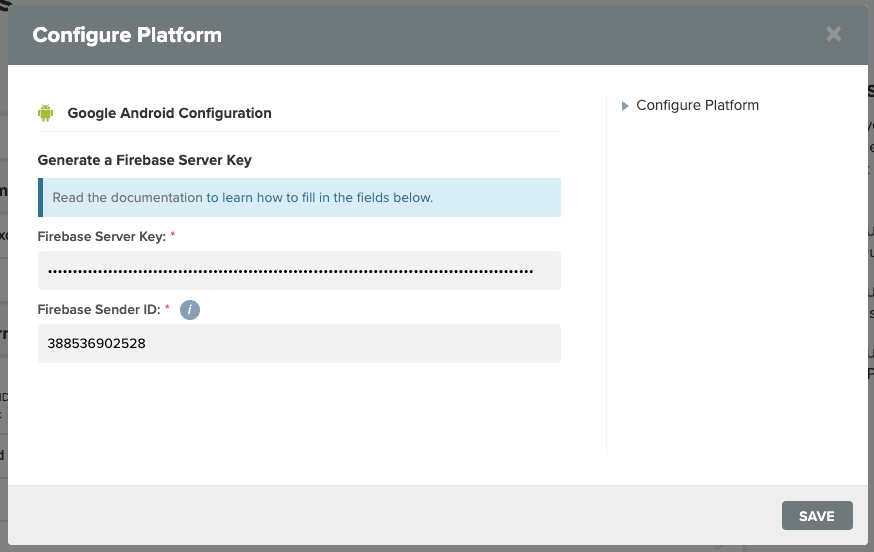
Paste your Firebase Server Key and Firebase Sender ID into the fields and click Save
Update App ID and push
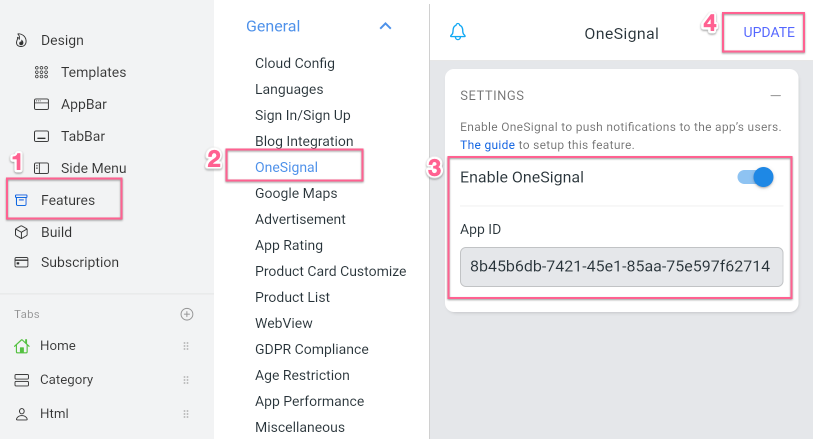
Configure your OneSignal App ID in the Builder:
Go to OneSignal dashboard, click on the gear icon Settings at the top right, and select the Keys & IDs tab. Under the Keys & IDs tab, copy your
ONESIGNAL APP ID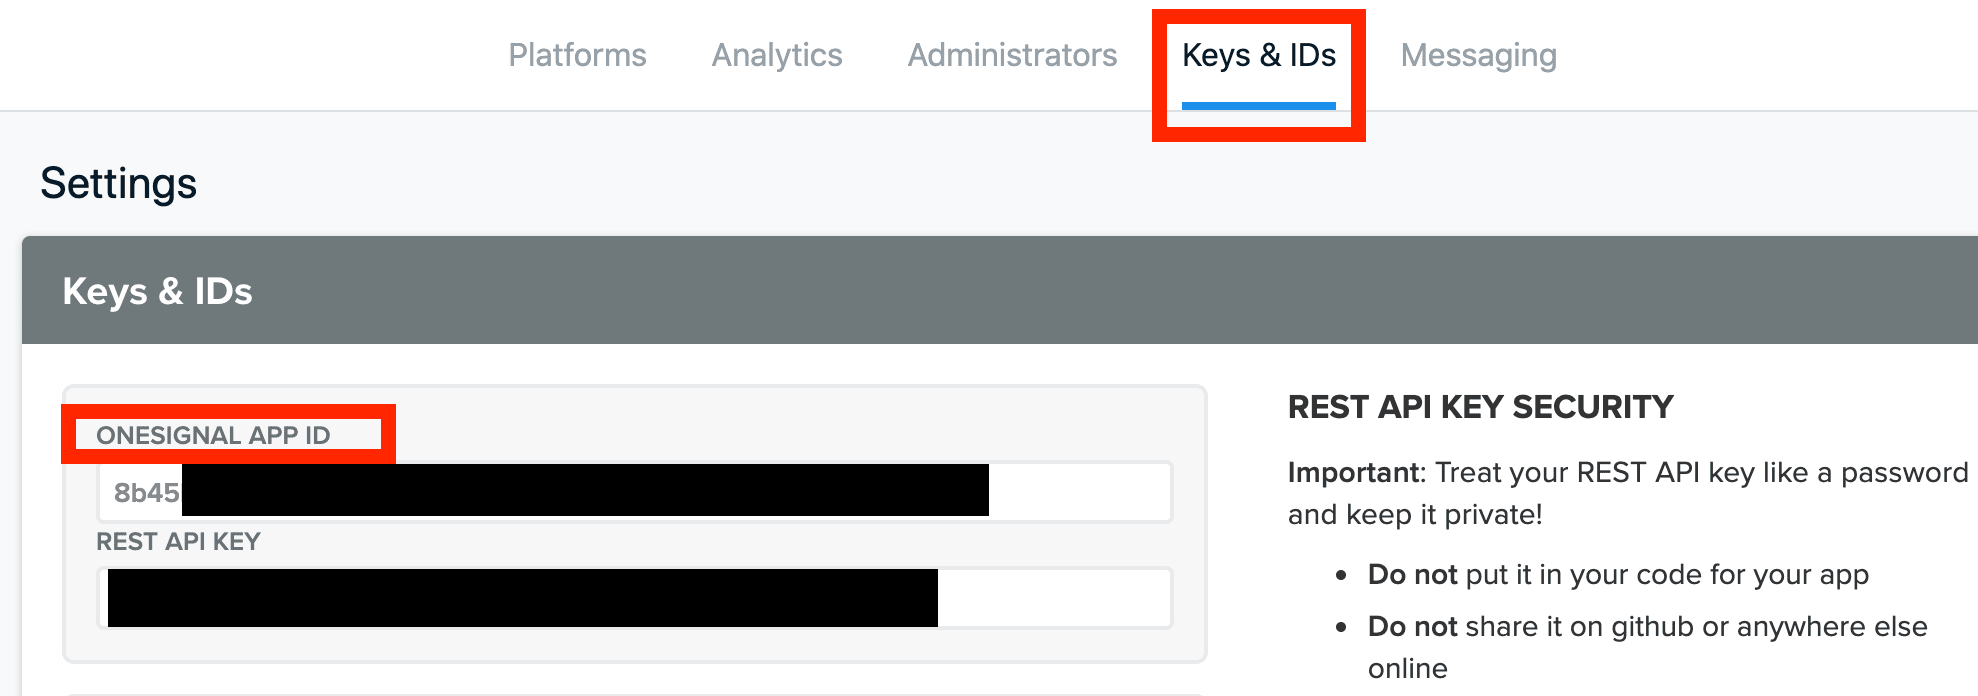
Enter your OneSignal App ID at
appID:
Push your first notification:
At OneSignal dashboard, click on the Messages icon at the top menu bar. In the Messages tab, click on the New Push button.

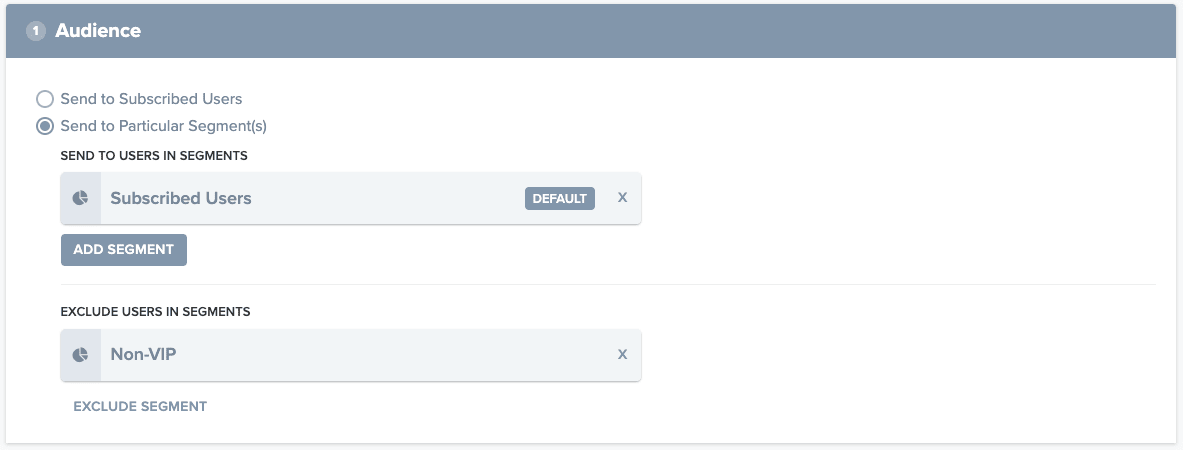
On the New Message screen, choose your Audience, then enter the message title, subtitle (iOS), message, image, and launch URL.
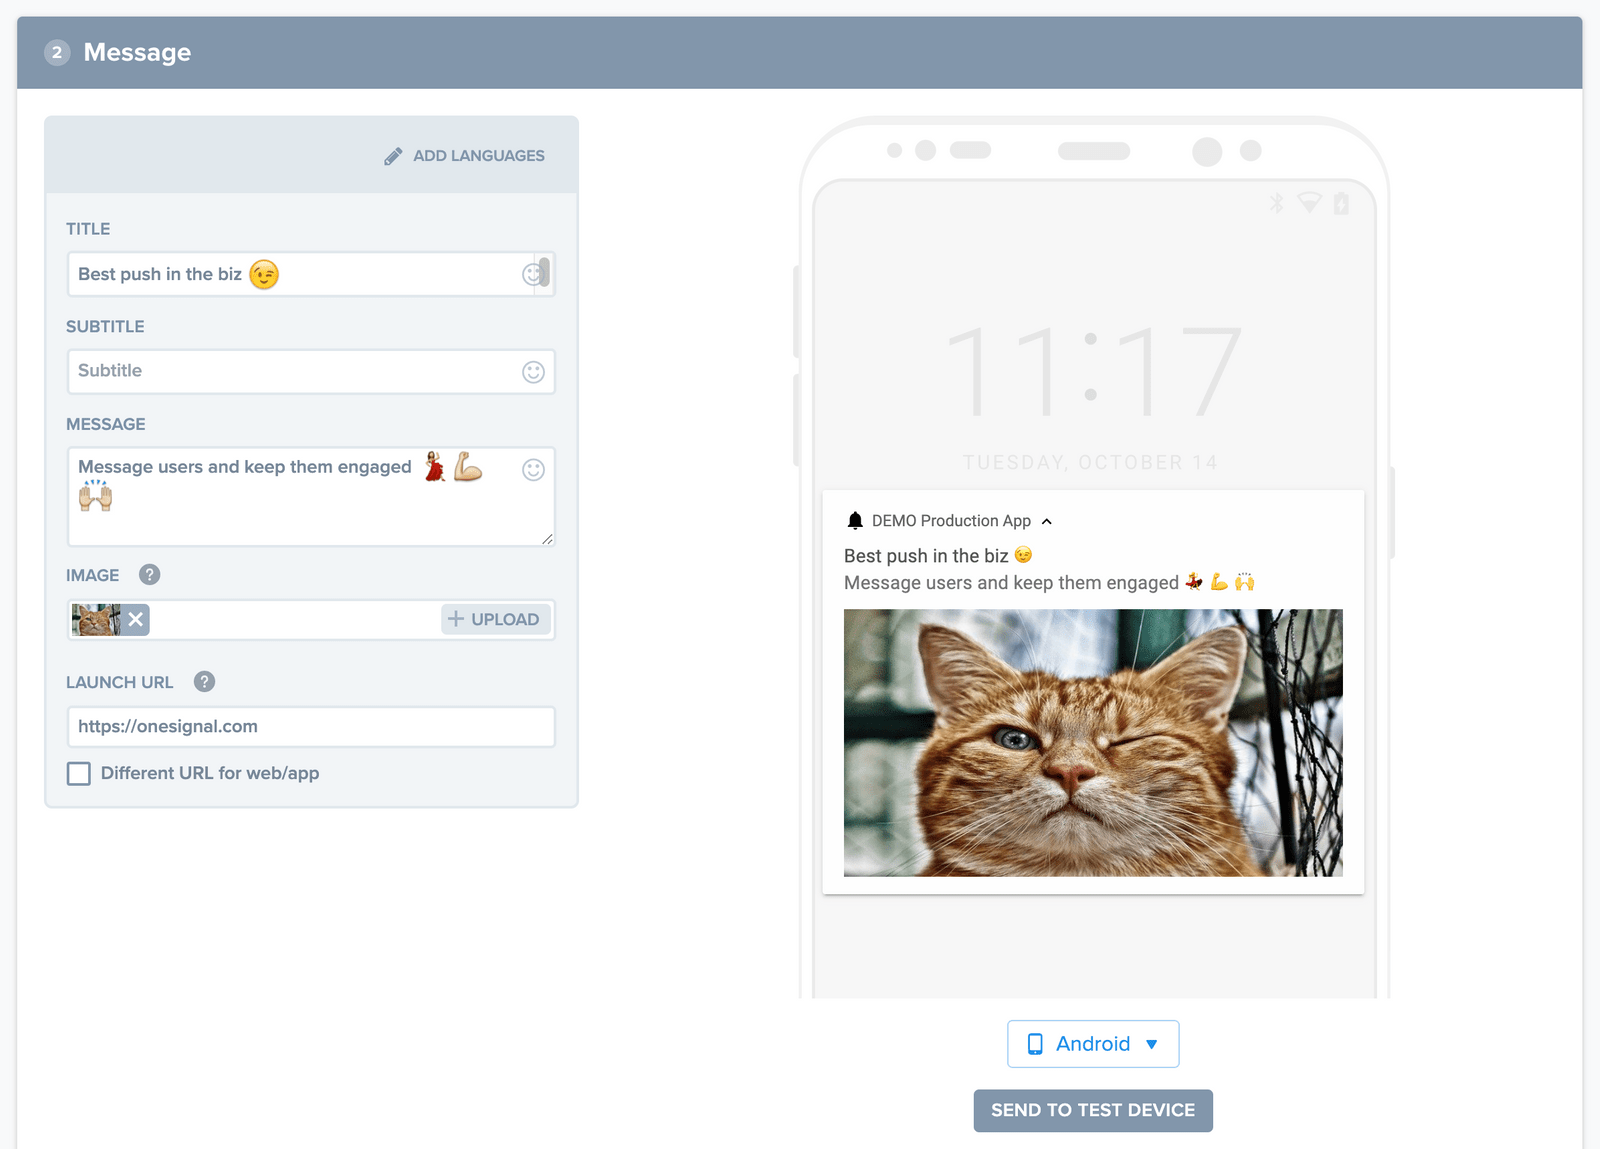
- At the end click on confirm. It will show you a pop-up for confirmation. Click Send Message
For advance settings, please refer OneSignal official documents
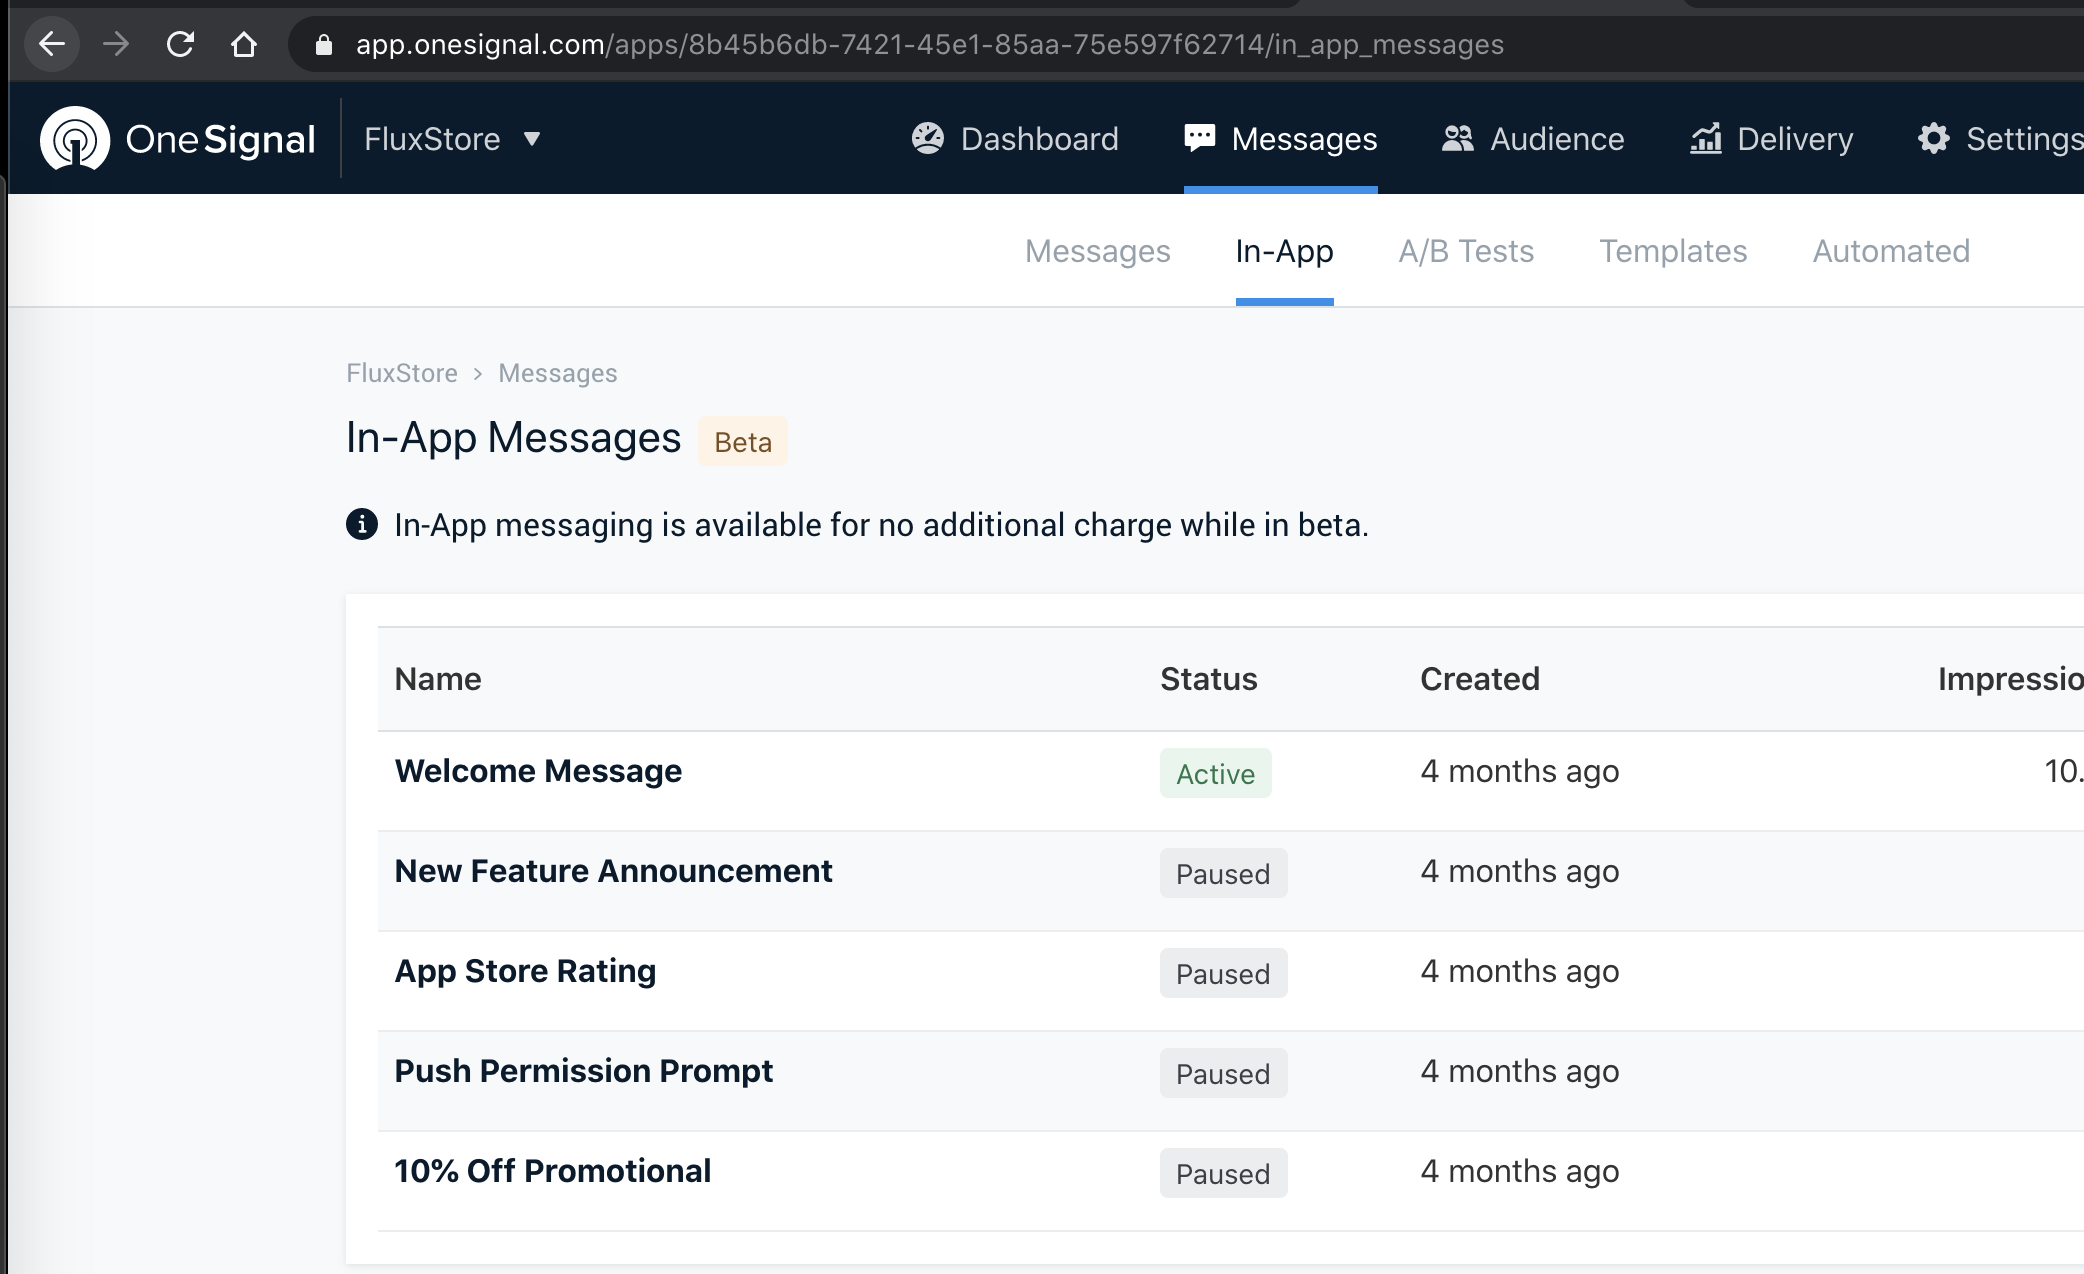
2. In-App Message
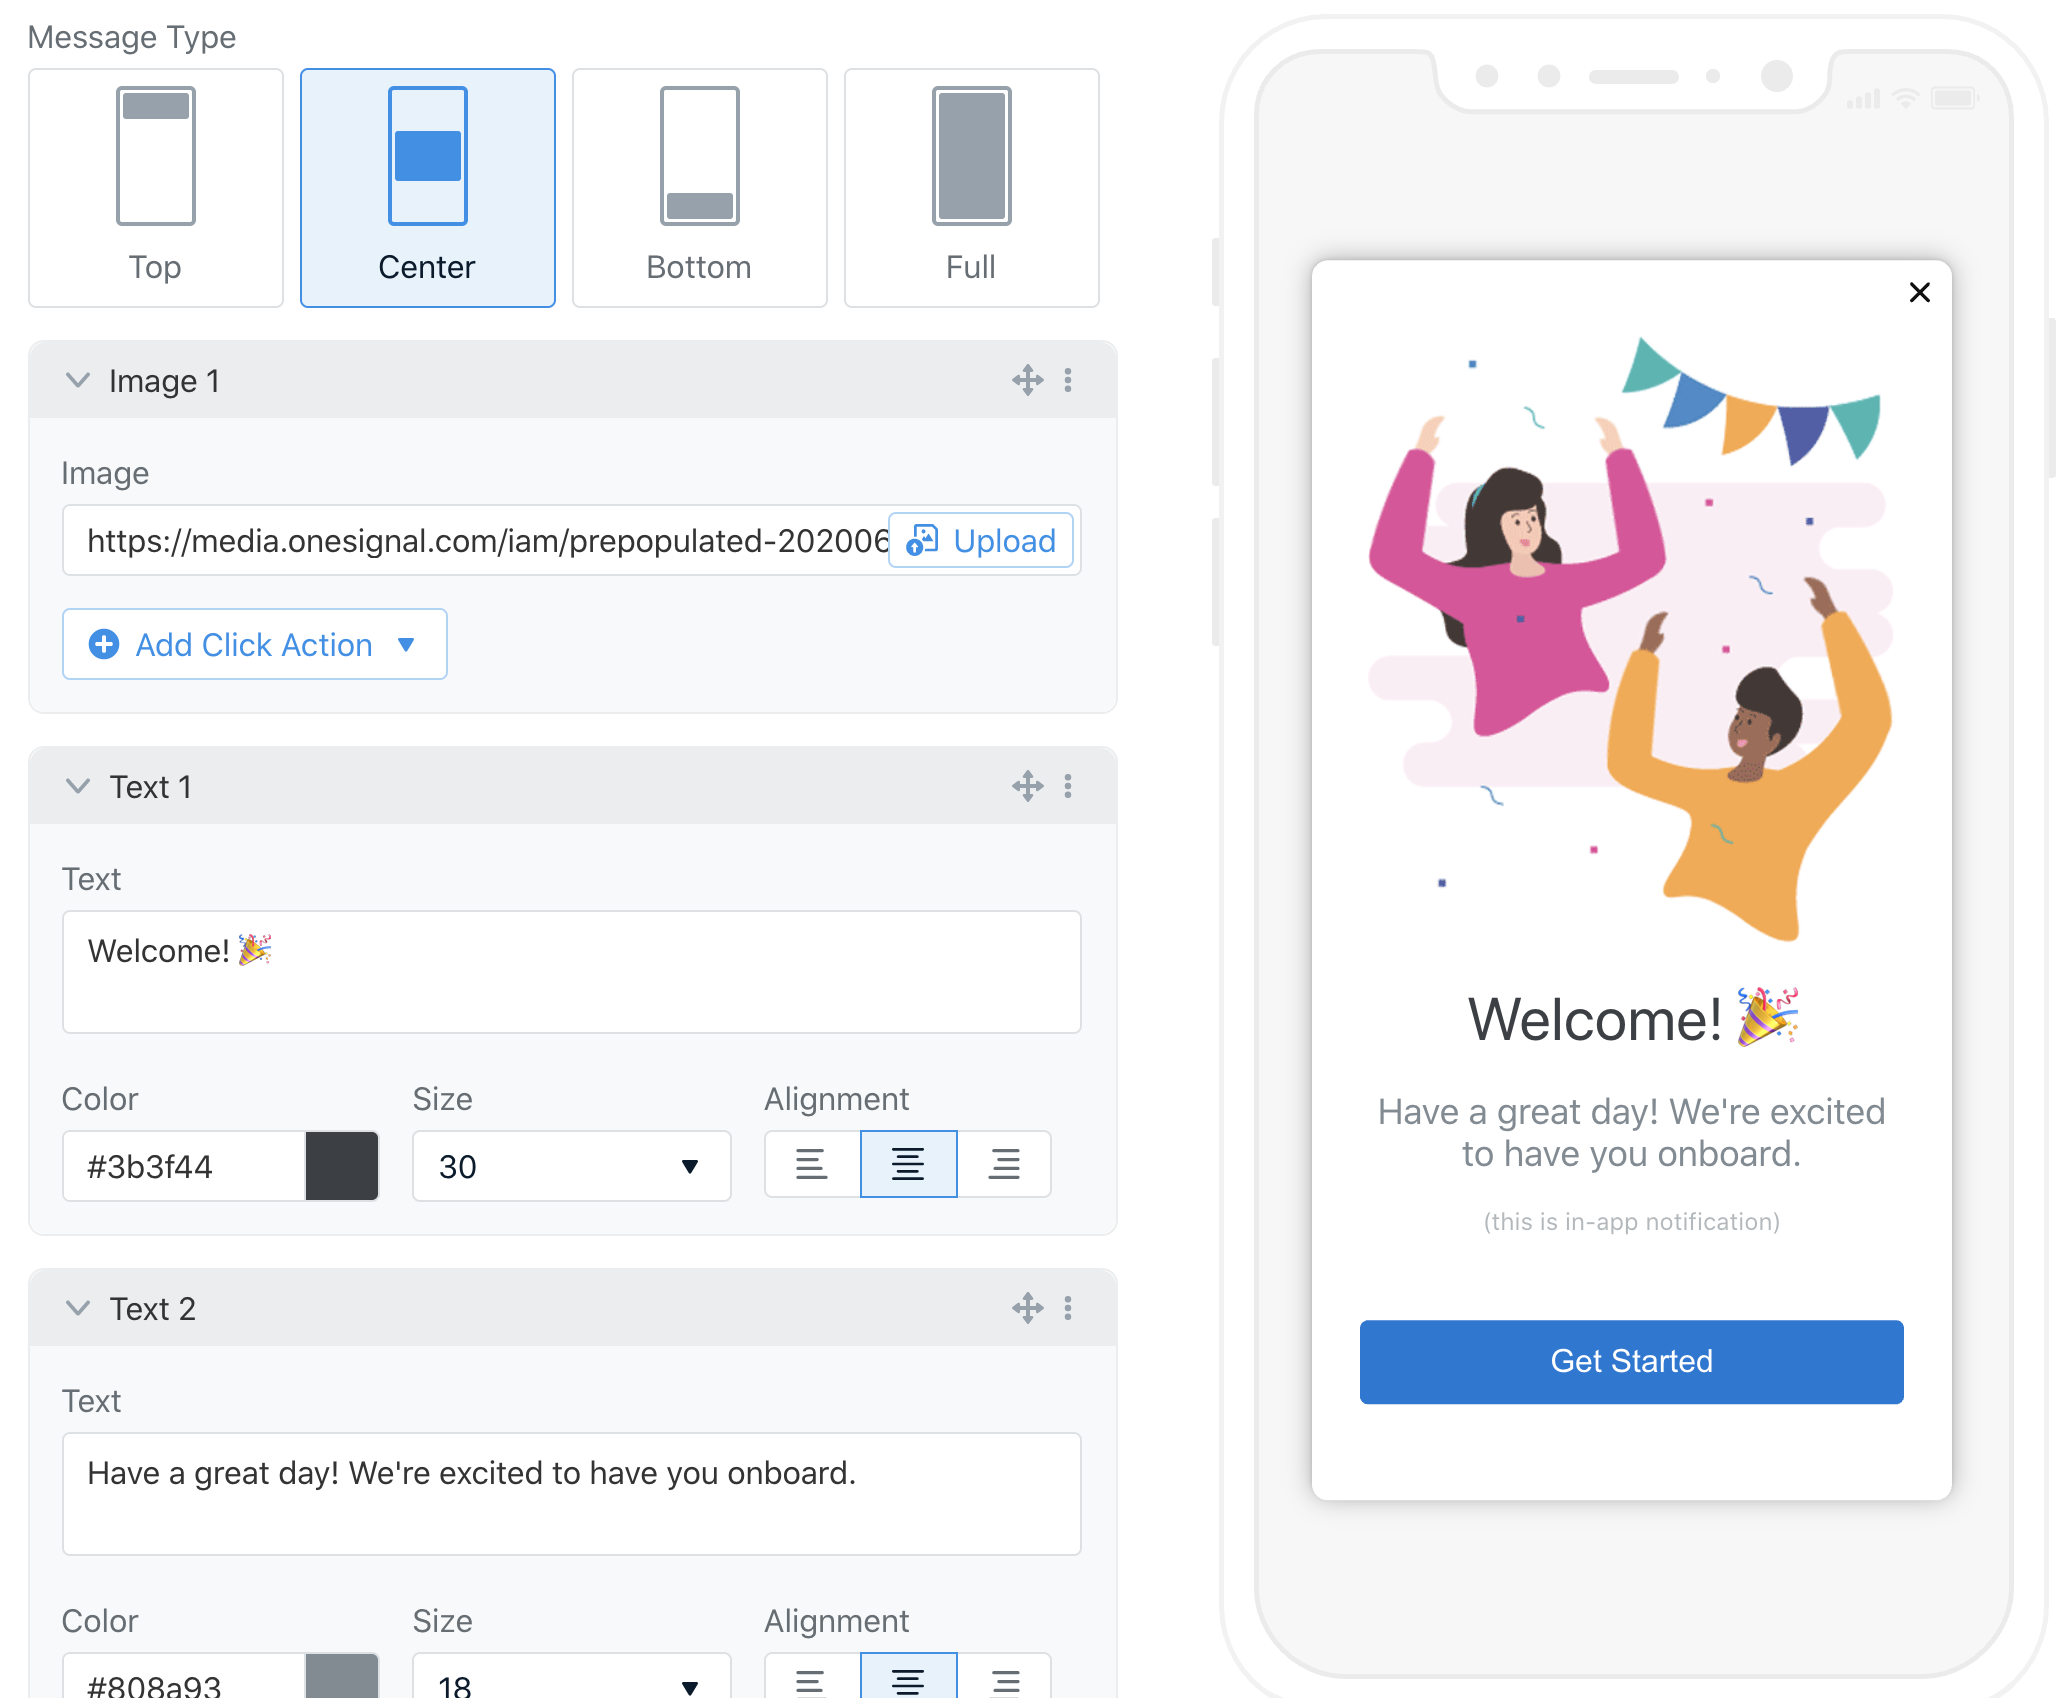
If you have configured the OneSignal library successfully, there is a great feature to support In-App Messages from OneSignal, The flexible UI will dynamically be displayed on your mobile app instantly or scheduled based on your plan.
To enable this feature, make sure to pass the config on the above guideline, then log in with your own OneSignal Account, select Project > Messages > In-App, you can create a new In-app message or use the default templates from OneSignal.