Dynamic Link (Deeplink)
This guide shows how to configure the Deep Links using Firebase Dynamic Link.
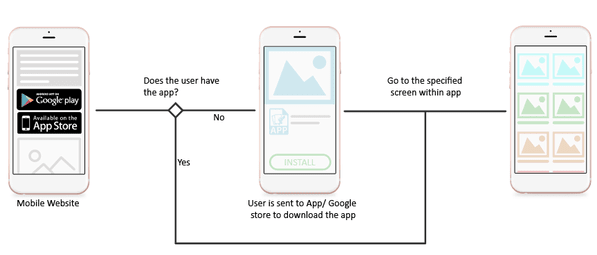
How does Firebase Dynamic Link work?
1. Preconditions
- Your app must be successfully connected to Firebase by following https://docs.shopbuilder.app/Features/firebase-settings/
- Your app must be released on Google Play and App Store.
2. URL Prefix
Follow guide to configure the URL Prefix as below:
Go to Firebase console and select your Firebase project.
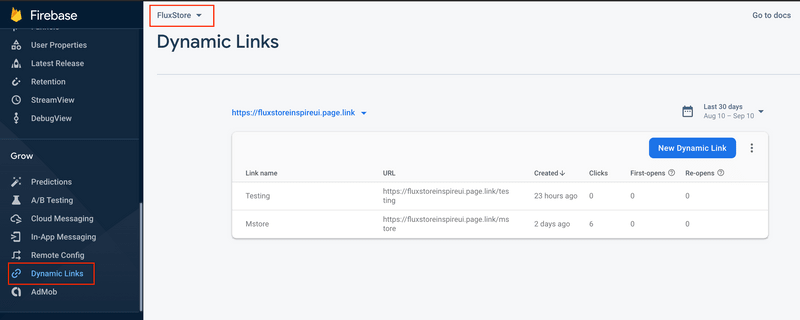
In Dynamic Links screen, click on
Get Startedbutton if this is your first time working with Firebase Dynamic Link. Otherwise, click on the current existing URL Prefix dropdown button, and click onadd URL prefix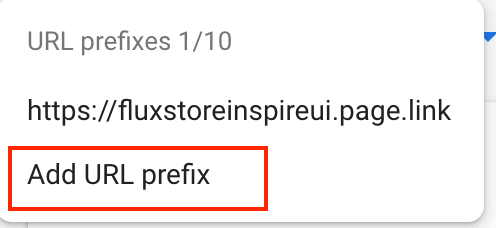
Type the domain name you want to use for your Dynamic Links. You can use the domain you own (for example,
yourdomain.comorapp.yourdomain.com), or a free Google-provided domain (for example,yourapp.page.link). In this project, we are usingfluxstoreinspireui.page.linkfor testing.Finish the following steps: Configure, Verify and Finish to get URL prefix.
3. For iOS app
If you need an iOS app, follow this guide to configure more:
Open your firebase project console, click the gear icon in the upper left corner and select
Project settingsIn general tab, click on your project on iOS apps list, then edit your
App Store ID. You can find your App Store ID in your app’s URL. In the example below,1469772800is the App Store ID at https://itunes.apple.com/us/app/yourapp/id1469772800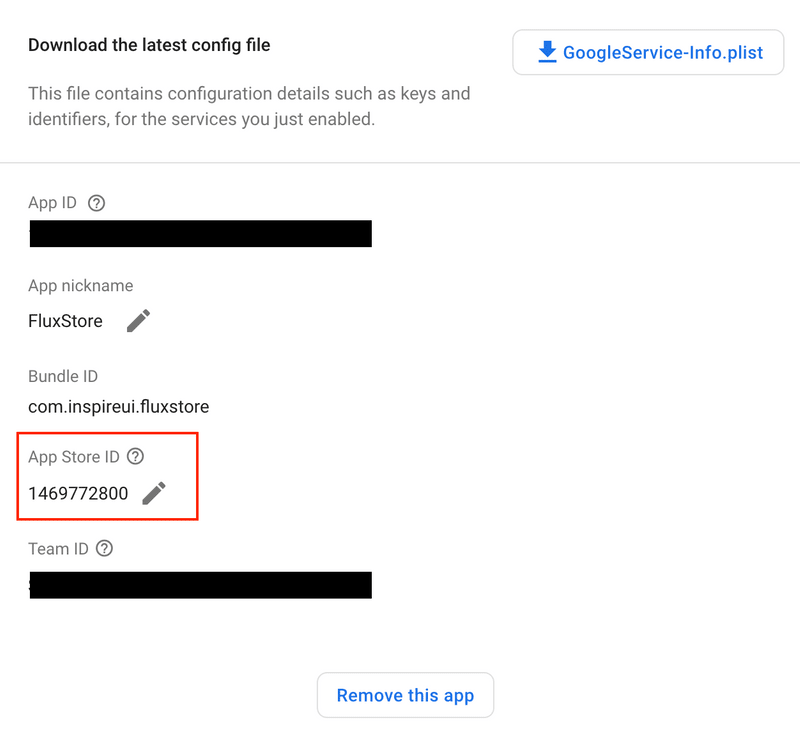
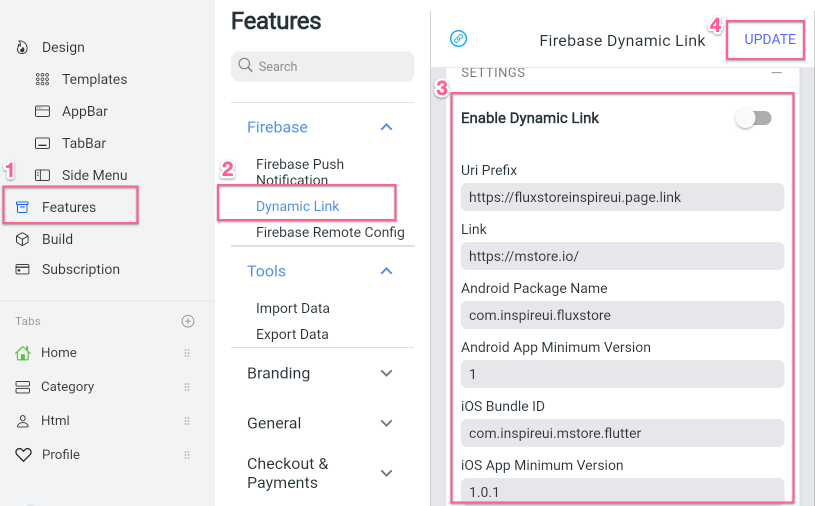
4. Execute the Dynamic Link
Update the information as the image below:
5. Test
This step guides to test your Firebase Dynamic Link: (a link will open the app directly or refer to App Stores to download the app)
When your app is already installed:
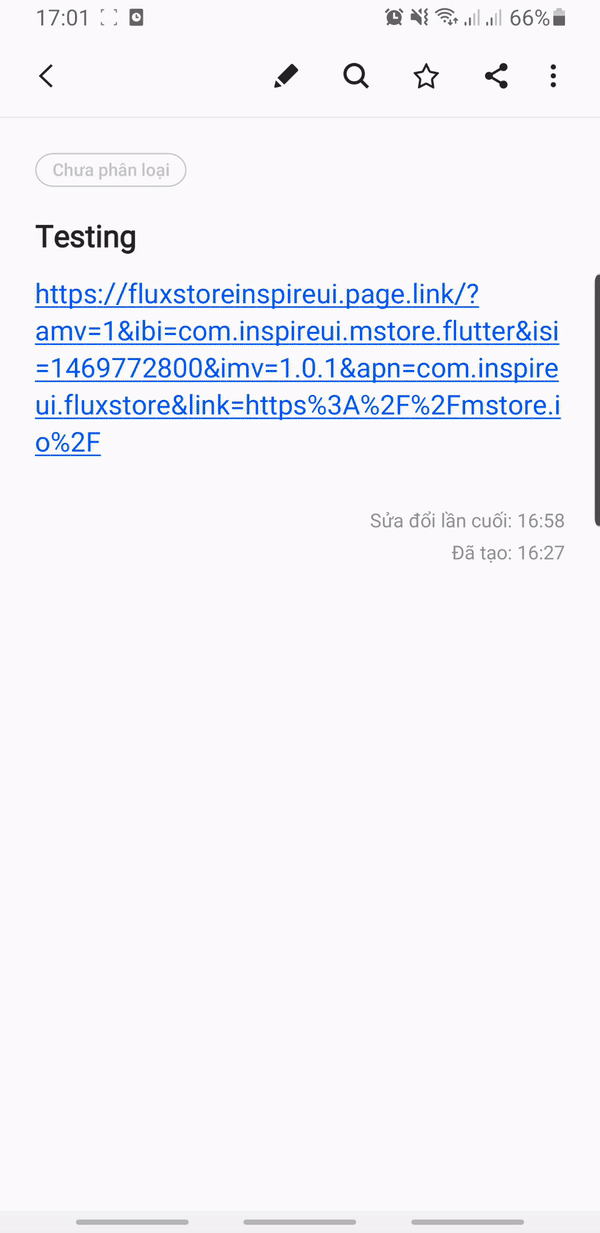
When your app is not installed:
6. Share
This step guides to share a specific product with Firebase Dynamic Link:
- Make sure you have done from step 1 to step 5.
- Go to Admin Dashboard > Settings > Permalinks. At Product permalinks, edit Custom base:
product/

- You now can get Dynamic Link by click on "Share" in a product. This is how this feature should work: Android demo reference & iOS demo reference
7. Dynamic link for Notification
The feature allows sending a Notification with the Product URL. When users open Notification, App is launched with that product.
Only Android devices support the feature currently.
Video guide:
Manual guide:
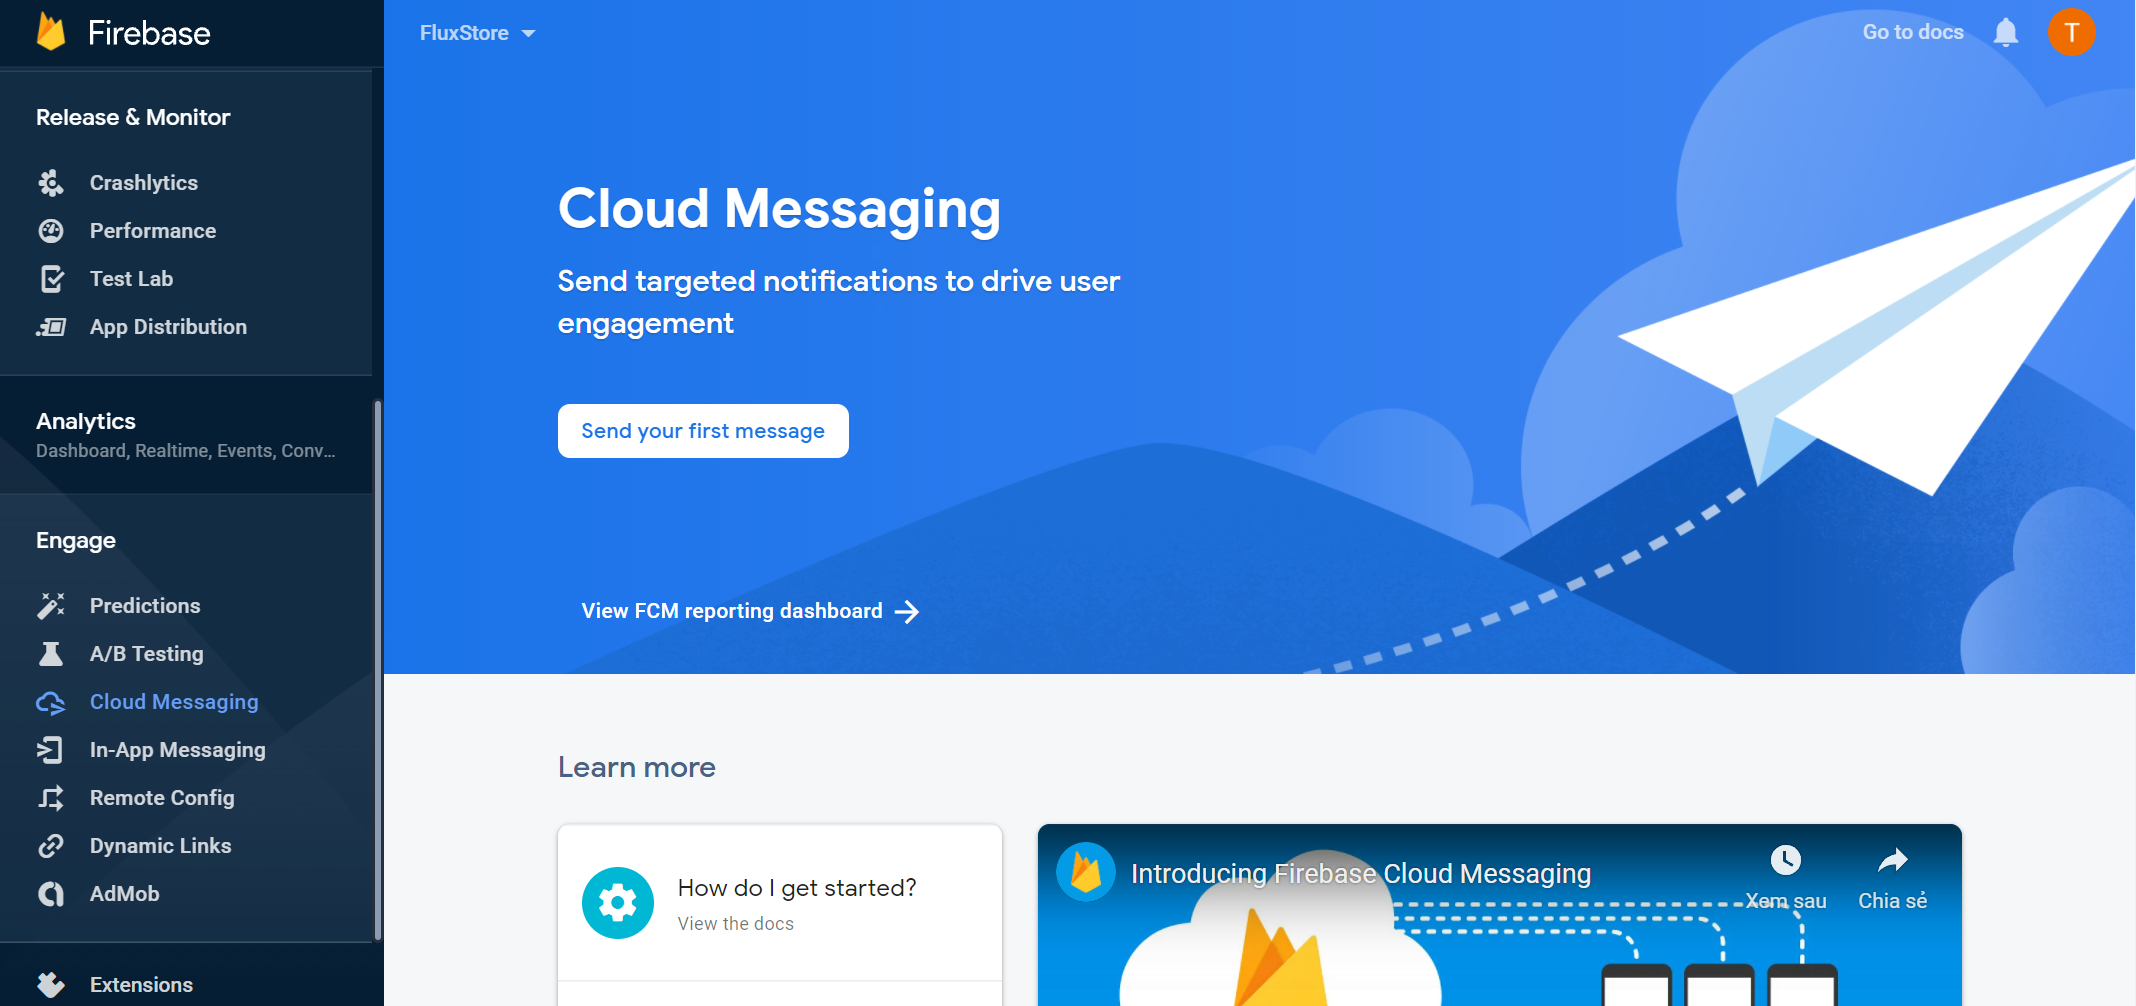
To make the feature work, go to the Cloud Messaging from Firebase Console, and Send your first message.
Then, on the Compose Notification screen, fill in the necessary information in all steps Information, Target, Scheduling, Conversion events (optional), and Additional options (optional).
In step 4 - Additional options (optional) - you will add a Key-Value for the Custom Data, fill dynamic_link for Key and the Product URL for Value.
That's all 🙂